We couldn't resist sneaking some sparkle into the Easter celebration with these bunny napkin rings.
This cute little bunny will make an impression, whether it's used as a napkin ring for a special Easter dinner or placed elsewhere around the home. This bunny by Eri Attebery is a bit more complicated to make than some of the other designs on our website, but we've included step-by-step instructions with helpful pictures to guide you through the entire process.
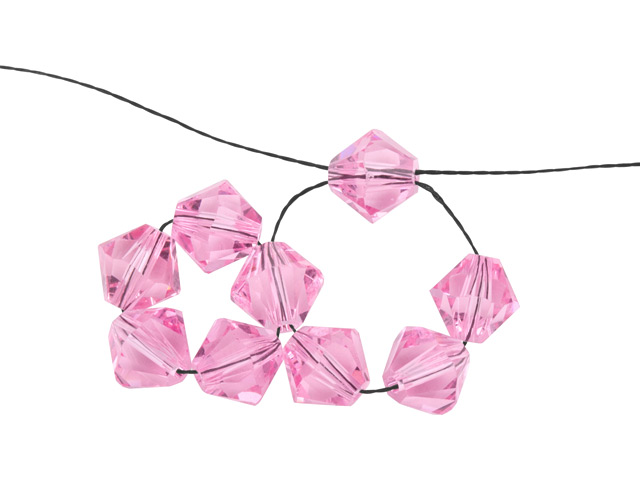
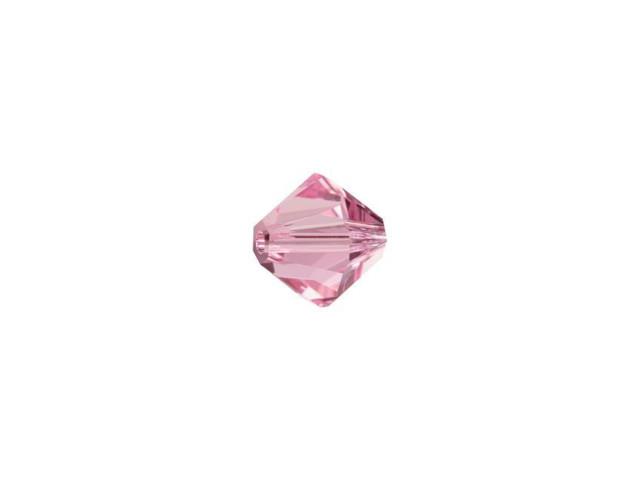
Cut 36 inches of Fireline string and thread both ends with beading needles. Separate out 20 6mm bicones in Light Rose. Hold one end of the string in each hand. Pick up five pink bicones with the Right string. Pass the Left string through the last pink bicone, forming a circle. Center the circle on your string, pull tight.
As you string the remaining beads, you will move in a counterclockwise direction.
Pick up four bicones with the Right string. Pass the Left string through the last pink bicone that you picked up. Pass the Left string through the pink bicone nearest to the one with which you ended so that both of your string ends are mirroring each other. Your design should now look like two interconnected circles.
Pick up three bicones with the Right string. Pass the Left string through the last bicone that you picked up. Pass the Left string through the pink bicone nearest to the one with which you ended so that both sides of your design are mirrored. Your design should now look like three interconnected circles.
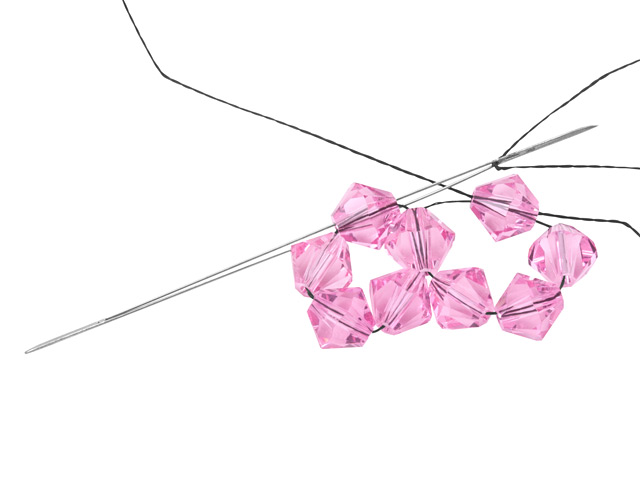
Pick up three bicones with the Right string and pass the Left string through the last one. Pass the Left string through the bicone nearest the one with which you ended. Keep in mind that the beads you will need to pass through will be on the outer edge of your design.
Pick up three bicones with the Right string and pass the Left string through the last one. Pass the Left string through the two pink bicones nearest the one with which you ended on the left side. Keep in mind that the bead through which you will need to pass will be on the outer edge of your design.
Pick up the last two pink bicones with your Right string. Pass the Left string through them both and pull tight. Your design should now look like a half dome. You will want to position your dome so that it sits like a bowl. Your string should be on the right side of the dome, with one string pointing up and one pointing down.
,
Bunny's Head (Front)
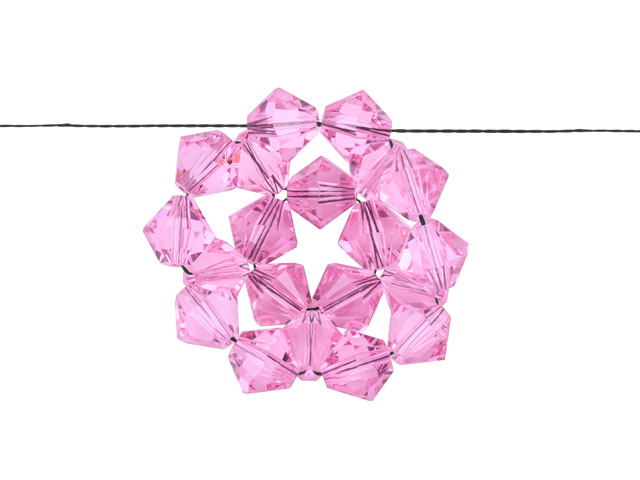
You will now use the remainder of your beads. Hold the string pointing down in your left hand and the string pointing up in your right hand.
Pick up two pink bicones with the Left string. Pick up one 6mm round pearl in Light Blue (the bunny's eye) with the Right string. Pass the Left string through the pearl and pull tight. Pass the Right string through the two pink bicones on the outer edge that are closest to the bottom of the Light Blue pearl.
Pick up one pink bicone with each string, pass the Left string through the bead on the Right string, pull tight. Pass the Right string through the two pink bicones on the outer edge that are closest to the bottom of the bead with which you ended.
Pick up one pink bicone with the Left string and one pearl (the other eye) with the Right string. Pass the Left string through the pearl. Pass the Right string through the two pink bicones on the outer edge that are closest to the bead with which you ended.
Pick up one pink bicone with each string. Pass the Left string through right side bead. Pass the Right string through the two pink bicones on the outer edge that are closest to where you ended.
You also want to pass the Right string through the pink bicone directly above where the string is now exiting. Both sides will now be mirrored. Your right string should now be facing towards the right eye.
Pick up one pink bicone with the right string, and pass the Left string through it. ,
Bunny's Nose
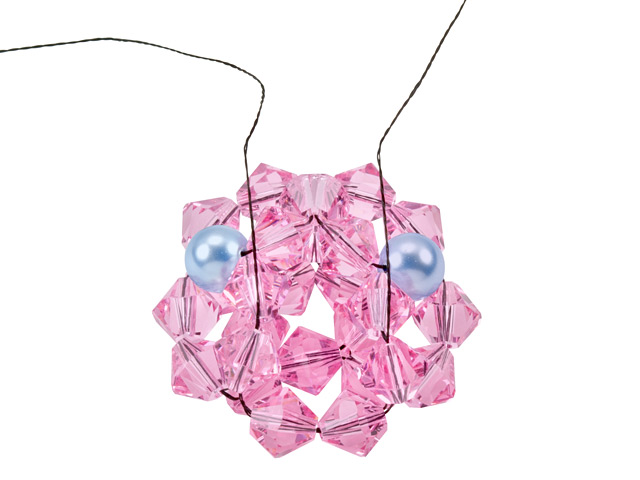
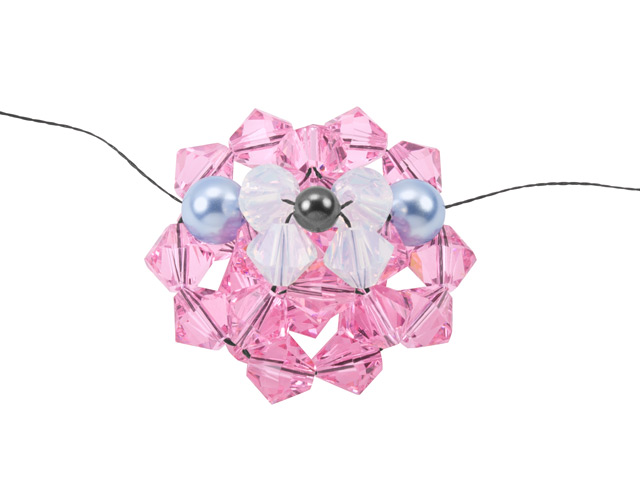
Pick up one 6mm Bicone White Opal with each string. Pick up the 4mm Round Pearl in Black (the bunny's nose) with the Right string and pass the Left string through the Black pearl. Pick up one white bicone with each string. Pass the Left string through the left side blue eye pearl. Do the same with the right side eye and string. Now both strings should be exiting the top of the bunny's eyes going towards the top of his head.
,
Bunny's Ears
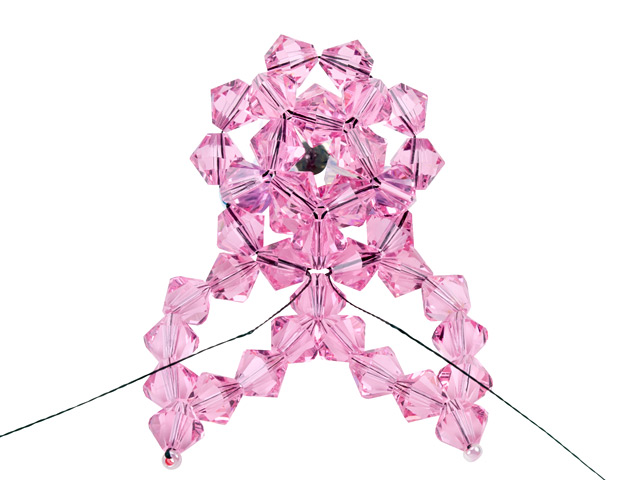
Pass the Right string through the two pink bicones directly above where your string is exiting so that the string ends up at the top center of the bunny's head. This is where your bunny's ears will start.
Pick up five pink bicones and one round 11/0 ceylon light pink TOHO bead with the Right string. Pass the right string back through the last pink bicone added and pull tight. This is the point of the bunny's ear.
Pick up four pink bicones with the same string, pass the string through a pink bicone on the bunny's head so that the string returns to the top center of the bunny's head.
Your string should be pointing towards the center of the bunny head and not towards the outside of the head. Set the Right string aside.
Now, we will build an ear on the left side.
Heading for the top of the bunny's head, pass the Left string through the two pink bicones so that this string is at the top center. Also pass through the first pink bicone that makes up the right side ear.
Pick up four pink bicones and one TOHO bead. Pass the string back through the last pink bicone that you added and pull tight.
Pick up four more pink bicones. Pass the Left string through the pink bicone at the top of the bunny's head so that your string is exiting the bead and pointing towards the center, just under the ears. Pass both strings through to the backside of the bunny head and knot them behind the ears.
,
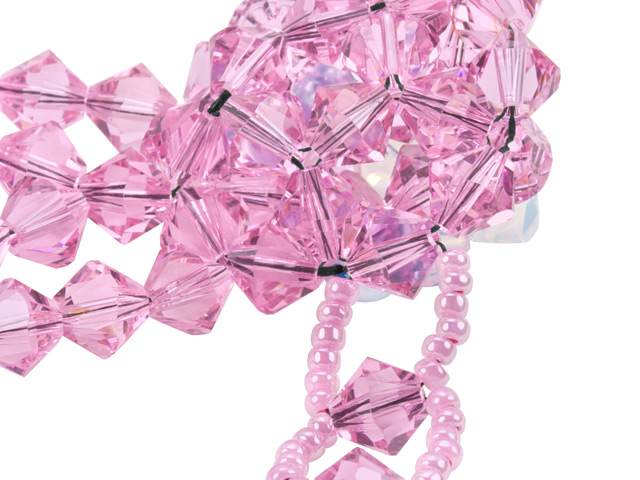
The Band
You can use any pattern you like to build the band. We used pink bicones and TOHO beads.
Cut a length of Elonga approximately three times the length you really need. We chose to start at the pink bicone beside the blue eye pearl. Pass your string through the pink bicone and center the bicone on your string. Pick up six seed beads with both strings. With just one of your strings (it doesn't matter which one) pick up a pink bicone and pass through it with the opposite string. Pull tight.
We repeated this step nine times, but you can make the band as big as you need it to be. After you've made the band as big as you want, pass the string through the pink bicone opposite the bead that you started from and knot your string. You can add a drop of superglue to the knots to keep them in place.
You can make this bunny in any size, using the same amount of beads.
List of Components: 6mm Round Pearl Light Blue (5810-BLULT6, qty 2) 6mm Bicone White Opal (5328-WHOP6, qty 4) 4mm Round Pearl Black (5810-BLK4, qty 1) TOHO™ Bead Round 11/0 Ceylon Light Pink (TBRD11-911, qty 1) 6mm Bicone Light Rose (5328-ROLT6, qty 54)
Add all available items to your cart at once or edit the quantities below.
Any items with quantities lower than stated minimums will default to the minimum in your cart.
Nice choice! All or most of the products needed for this project are shown
below with quantities. Sometimes we sell out of components and aren’t able to order more from
the manufacturer (we know, it is very disappointing to us, too). Use the opportunity to mix up
the design and make it yours by substituting similar products or altering the entire color
scheme—it’s up to you!
Please wait while we add the products to your cart.
Peter Cottontail Napkin Ring
DIY Woven Crystal Bunny Napkin Ring Holder
designed byArtbeads
Skill LevelAdvanced (or at least patient)
Time1-3 Hours
We couldn't resist sneaking some sparkle into the Easter celebration with these bunny napkin rings.
This cute little bunny will make an impression, whether it's used as a napkin ring for a special Easter dinner or placed elsewhere around the home. This bunny by Eri Attebery is a bit more complicated to make than some of the other designs on our website, but we've included step-by-step instructions with helpful pictures to guide you through the entire process.
Supplies
TOHO Bead Round 11/0 Ceylon Light Pink, 2.5-Inch Tube
Code TBRD11-911
$1.59
×1
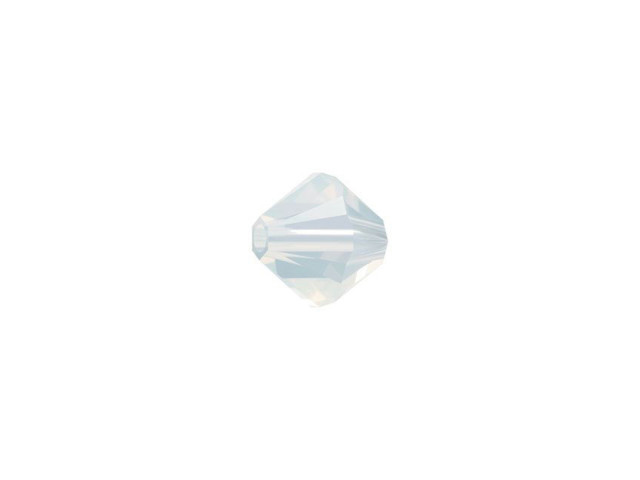
PRESTIGE 5328 6mm Bicone Bead White Opal - Min Qty 4
Code 5328-WHOP6
$0.38
×4
PRESTIGE 5328 6mm Bicone Bead Light Rose - Min Qty 4
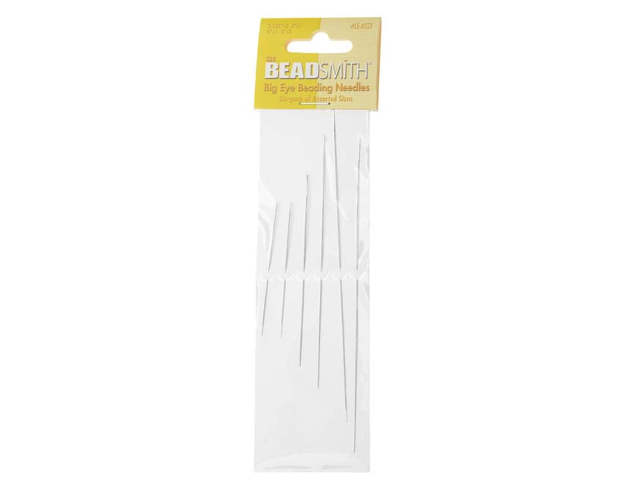
The BeadSmith Assorted Sizes Big Eye Beading Needles 6-Pack
Code NEED-15
$22.69
×1
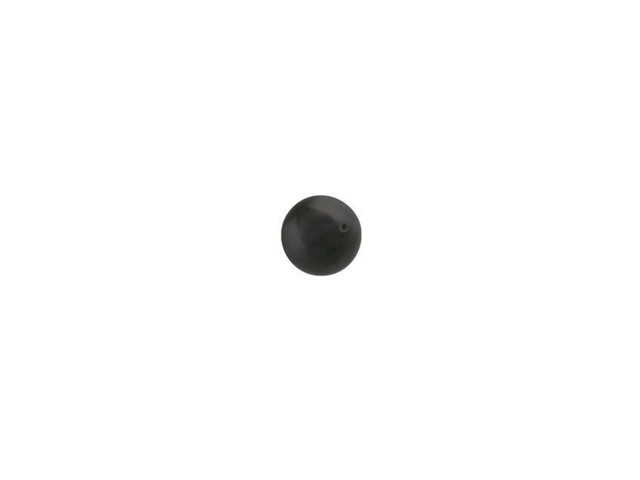
PRESTIGE 5810 4mm Round Crystal Pearl Black - Min Qty 10
Code 5810-BLK4
$0.13
×1
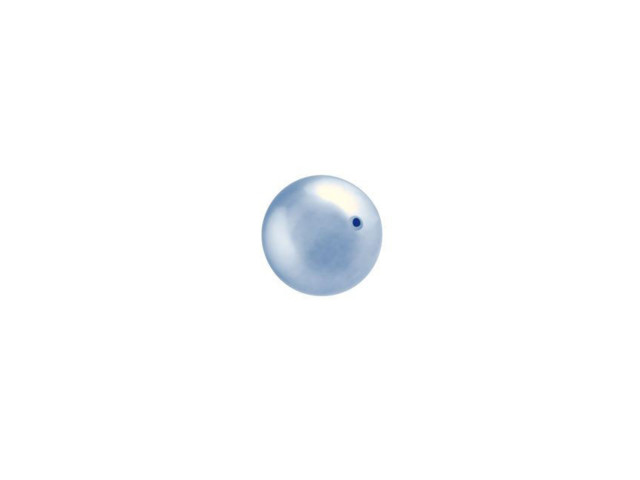
PRESTIGE 5810 6mm Round Crystal Pearl Light Blue - Min Qty 10
Code 5810-BLULT6
$0.19
×2
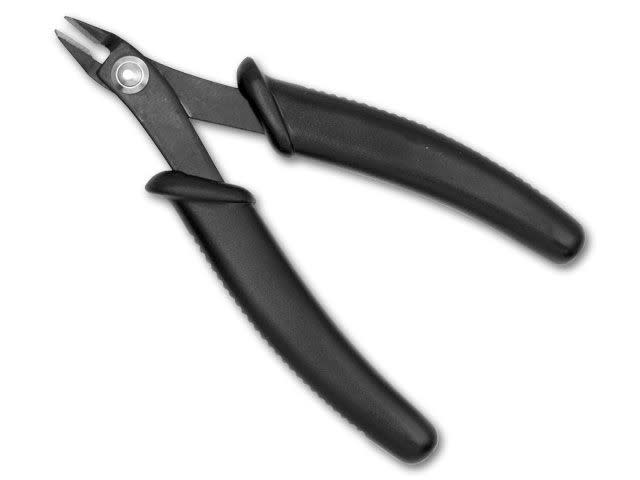
The BeadSmith Crystal Clear FireLine - 50 Yards (6-Pound Test)
Code FL06CR50
$12.09
×1
Step-by-Step Instructions
Bunny's Head (Back)
Cut 36 inches of Fireline string and thread both ends with beading needles. Separate out 20 6mm bicones in Light Rose. Hold one end of the string in each hand. Pick up five pink bicones with the Right string. Pass the Left string through the last pink bicone, forming a circle. Center the circle on your string, pull tight.
As you string the remaining beads, you will move in a counterclockwise direction.
Pick up four bicones with the Right string. Pass the Left string through the last pink bicone that you picked up. Pass the Left string through the pink bicone nearest to the one with which you ended so that both of your string ends are mirroring each other. Your design should now look like two interconnected circles.
Pick up three bicones with the Right string. Pass the Left string through the last bicone that you picked up. Pass the Left string through the pink bicone nearest to the one with which you ended so that both sides of your design are mirrored. Your design should now look like three interconnected circles.
Pick up three bicones with the Right string and pass the Left string through the last one. Pass the Left string through the bicone nearest the one with which you ended. Keep in mind that the beads you will need to pass through will be on the outer edge of your design.
Pick up three bicones with the Right string and pass the Left string through the last one. Pass the Left string through the two pink bicones nearest the one with which you ended on the left side. Keep in mind that the bead through which you will need to pass will be on the outer edge of your design.
Pick up the last two pink bicones with your Right string. Pass the Left string through them both and pull tight. Your design should now look like a half dome. You will want to position your dome so that it sits like a bowl. Your string should be on the right side of the dome, with one string pointing up and one pointing down.
,
Bunny's Head (Front)
You will now use the remainder of your beads. Hold the string pointing down in your left hand and the string pointing up in your right hand.
Pick up two pink bicones with the Left string. Pick up one 6mm round pearl in Light Blue (the bunny's eye) with the Right string. Pass the Left string through the pearl and pull tight. Pass the Right string through the two pink bicones on the outer edge that are closest to the bottom of the Light Blue pearl.
Pick up one pink bicone with each string, pass the Left string through the bead on the Right string, pull tight. Pass the Right string through the two pink bicones on the outer edge that are closest to the bottom of the bead with which you ended.
Pick up one pink bicone with the Left string and one pearl (the other eye) with the Right string. Pass the Left string through the pearl. Pass the Right string through the two pink bicones on the outer edge that are closest to the bead with which you ended.
Pick up one pink bicone with each string. Pass the Left string through right side bead. Pass the Right string through the two pink bicones on the outer edge that are closest to where you ended.
You also want to pass the Right string through the pink bicone directly above where the string is now exiting. Both sides will now be mirrored. Your right string should now be facing towards the right eye.
Pick up one pink bicone with the right string, and pass the Left string through it. ,
Bunny's Nose
Pick up one 6mm Bicone White Opal with each string. Pick up the 4mm Round Pearl in Black (the bunny's nose) with the Right string and pass the Left string through the Black pearl. Pick up one white bicone with each string. Pass the Left string through the left side blue eye pearl. Do the same with the right side eye and string. Now both strings should be exiting the top of the bunny's eyes going towards the top of his head.
,
Bunny's Ears
Pass the Right string through the two pink bicones directly above where your string is exiting so that the string ends up at the top center of the bunny's head. This is where your bunny's ears will start.
Pick up five pink bicones and one round 11/0 ceylon light pink TOHO bead with the Right string. Pass the right string back through the last pink bicone added and pull tight. This is the point of the bunny's ear.
Pick up four pink bicones with the same string, pass the string through a pink bicone on the bunny's head so that the string returns to the top center of the bunny's head.
Your string should be pointing towards the center of the bunny head and not towards the outside of the head. Set the Right string aside.
Now, we will build an ear on the left side.
Heading for the top of the bunny's head, pass the Left string through the two pink bicones so that this string is at the top center. Also pass through the first pink bicone that makes up the right side ear.
Pick up four pink bicones and one TOHO bead. Pass the string back through the last pink bicone that you added and pull tight.
Pick up four more pink bicones. Pass the Left string through the pink bicone at the top of the bunny's head so that your string is exiting the bead and pointing towards the center, just under the ears. Pass both strings through to the backside of the bunny head and knot them behind the ears.
,
The Band
You can use any pattern you like to build the band. We used pink bicones and TOHO beads.
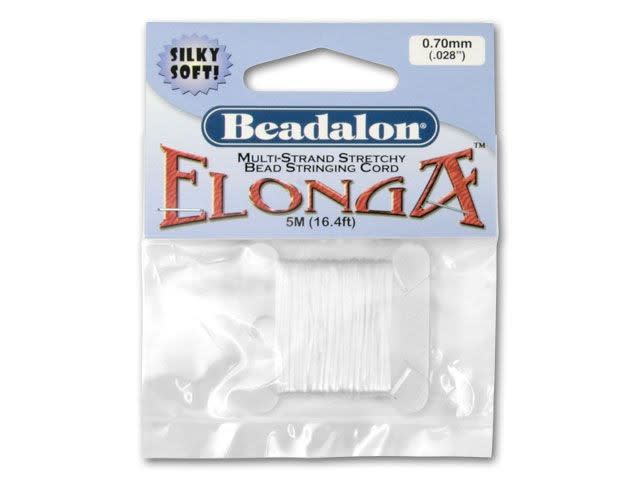
Cut a length of Elonga approximately three times the length you really need. We chose to start at the pink bicone beside the blue eye pearl. Pass your string through the pink bicone and center the bicone on your string. Pick up six seed beads with both strings. With just one of your strings (it doesn't matter which one) pick up a pink bicone and pass through it with the opposite string. Pull tight.
We repeated this step nine times, but you can make the band as big as you need it to be. After you've made the band as big as you want, pass the string through the pink bicone opposite the bead that you started from and knot your string. You can add a drop of superglue to the knots to keep them in place.
You can make this bunny in any size, using the same amount of beads.
List of Components: 6mm Round Pearl Light Blue (5810-BLULT6, qty 2) 6mm Bicone White Opal (5328-WHOP6, qty 4) 4mm Round Pearl Black (5810-BLK4, qty 1) TOHO™ Bead Round 11/0 Ceylon Light Pink (TBRD11-911, qty 1) 6mm Bicone Light Rose (5328-ROLT6, qty 54)